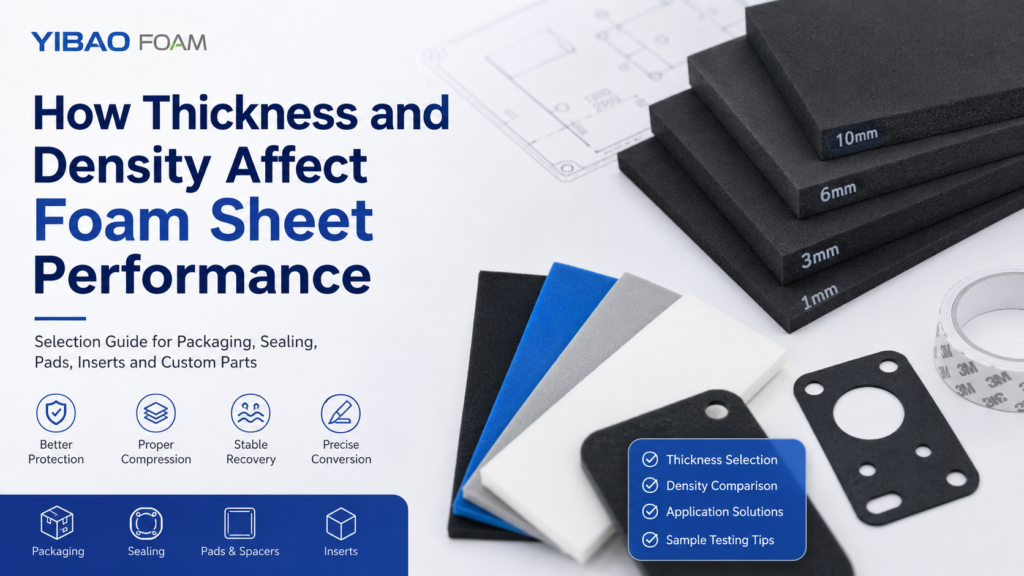
In industrial protective packaging, the most important part is often the one that stays hidden inside the box. A carton may look strong from the outside, but the real protection happens around the product, where custom foam inserts and shaped foam trays hold parts steady, separate finished surfaces, and reduce movement during transport. For industrial equipment, electronic parts, medical devices, tools, lighting parts, and precision assemblies, a shaped insert turns packaging from loose padding into a controlled protection system.
What Foam Inserts Solve in Protective Packaging
A foam insert solves movement first. During truck transport, air shipment, warehouse handling, and final delivery, a product rarely stays perfectly still. Even a small gap inside the carton can become a repeated impact point. The inner packaging must control sliding, shaking, rolling, and surface rubbing before the outer box takes visible damage.
A shaped insert also solves contact damage. A machined metal part can scratch another part. A painted housing can rub against cardboard fibre. A display frame can mark easily near the corners. Foam cavities create soft separation around sensitive faces, edges, lenses, connectors, buttons, and finished surfaces.
Moreover, a foam insert improves repeatability. In a busy assembly or packing area, every operator needs the same placement logic. A tray with shaped cavities makes the packing path clear. The main component fits in one position, while accessories sit in their own pockets. As a result, the packaging line becomes faster and fewer errors reach shipment.
Foam inserts also reduce unnecessary overpacking. Without a planned interior, teams often add more bubble wrap, paper padding, loose foam, or tape. That habit looks safe at first, but it creates inconsistent pressure and messy unpacking. A planned insert gives protection a fixed structure, so the package feels cleaner, safer, and easier to repeat.
Product Shape and Protection Level
Every insert starts with shape. A flat panel, cylindrical component, handle tool, molded part, and fragile assembly all need different support points. For example, a rectangular device may need corner protection and bottom support. A round component may need anti-roll pockets and side walls.
Weight alone does not decide the design. Contact area matters just as much. A heavy part with a broad base can sit safely in a firmer cavity. In contrast, a lighter part with sharp feet, pins, or raised details may need a softer contact layer or relief cut around sensitive areas.
Fragility changes the layout as well. Some products tolerate surface pressure but not shock. Others resist shock but scratch easily. Insert planning should separate impact protection, surface protection, and positioning. Each function may need a different thickness, foam type, or cutting method.
For assemblies with connectors, ports, clips, glass, lenses, screens, or coated surfaces, the cavity should avoid pressure on the most delicate zone. Instead, the insert should hold the stronger frame area. In other words, the foam should support the structure, not squeeze the feature that needs protection most.
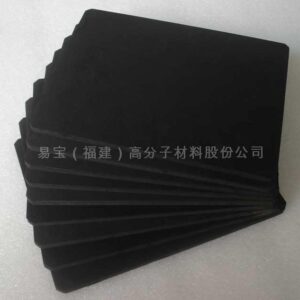
SBR foam can support soft contact layers, cushioning pads, and flexible protective layouts for parts that need a comfortable surface feel.
View SBR Foam MaterialHow to Read Product Risk Before Designing the Insert
First, check where the product usually gets touched, lifted, or placed on the table. Those areas often show the strongest structure. Then check the areas that should not carry load. Thin clips, display edges, cable ports, small pins, polished covers, and coated corners should stay away from direct foam pressure.
Next, think about the direction of impact. A heavy product may drop vertically. A long part may hit at the end. A fragile assembly may fail from side vibration. The insert should not only look like the product shape. It should respond to the most likely damage path.
Also, consider how the product leaves the box. A cavity that grips too tightly may feel secure during sampling. Repeated unpacking can still scratch the surface or bend small details. A finger notch, stepped edge, or small lift gap often improves removal without reducing protection.
Real Packaging Scenarios Where Foam Inserts Add Value
In an electronics workshop, a small controller may leave the assembly line with a cable, adapter, screw pack, and instruction sheet. If all parts move inside one carton, the cable plug can scratch the housing and the screw pack can mark the surface. A multi-pocket foam tray gives each part its own space and keeps the main unit clean.
In a precision tool kit, the problem is often visibility. Missing parts can delay inspection or installation. A shaped tray makes empty slots obvious. The packing team can spot missing tools before the carton closes, and the end-use team can repack the set without guessing where each part belongs.
For lighting parts, cosmetic protection often matters as much as shock resistance. A trim ring, lens, reflector, or coated housing can pass electrical checks but fail visual inspection after rubbing. The foam should separate finished surfaces and prevent side movement during vibration.
For medical and lab-related equipment, neat presentation supports inspection and handling. The insert should also reduce dust, odour concerns, and loose particles where necessary. In this situation, sample approval should include storage checks and repeated removal checks, not only a quick fit test.
For export machinery parts, the challenge often comes from mixed handling. A carton may move from factory floor to pallet, then to container, then to warehouse. Corner spacing, bottom support, and accessory separation become more important than a simple liner sheet.
Die Cut Foam Inserts vs CNC Foam Inserts
Die cutting works well when the insert needs clean outlines, repeated flat shapes, pads, spacers, simple cavities, or layered profiles. For repeated production, die cut foam inserts can support efficient output and consistent shapes. This method is often practical when the geometry does not require deep three-dimensional carving.
CNC cutting fits thicker foam, deeper pockets, stepped cavities, sample cases, and layouts that need more shape control. A CNC process can create pockets, relief areas, finger notches, and custom depths. Therefore, CNC foam inserts often support equipment cases, tool trays, and prototype packaging where the design may still change.
The decision is not only about the cutting method. It also depends on tolerance, foam thickness, cavity depth, quantity, edge quality, and setup cost. Die cutting may suit flat parts with repeat demand. CNC cutting may save development time when the product shape is still under review.
Layered construction offers another route. Several die cut layers can stack together to form a deeper cavity. This approach may control cost while giving a three-dimensional holding area. Adhesive choice, layer alignment, and compression behaviour must stay consistent.
A Simple Way to Choose the Process
- Choose die cutting when the insert uses flat shapes, repeated pads, spacers, liners, or shallow pockets.
- Choose CNC cutting when the cavity needs depth, step levels, complex outlines, or fast design changes.
- Choose layered foam when deeper support is needed but the project still benefits from flat cut layers.
- Choose a combined process when a tray needs both clean pads and routed cavities.
In practice, sampling should confirm fit, edge quality, tearing risk, finger notch strength, and removal force. A process that looks efficient on paper still needs to work with real foam behaviour, cutting tolerance, and product variation.
Materials for Foam Packaging Inserts
Material choice should start from product risk, not from a generic foam name. A soft material may look protective, but it can bottom out under weight. A firm material may hold shape well, yet it can mark a delicate surface. Packaging teams should match foam structure to load, finish, storage time, and shipping route.
EVA foam is often used for organized trays, tool layouts, sample boxes, and presentation packaging. It gives a firm feel, clean cutting, and stable cavity shape. EVA can also support color contrast when the layout needs quick visual checking.
PE foam suits lightweight cushioning, box lining, separation pads, and general shipping protection. It can reduce vibration and protect surfaces during normal handling. Density and thickness still need testing, especially when the product has sharp corners or high mass.
EPDM foam can support resilient pads, sealing-related protection, and parts that need compression recovery. Silicone foam can support special heat-adjacent pads or elastic protection needs. Meanwhile, SBR, SCR, and CR foam can support softer contact layers, flexible pads, and cushioning surfaces.
EVA foam is a practical choice for firm tray structures, clean cavity edges, and organized sample or tool packaging layouts.
View EVA Foam MaterialSurface Protection Matters as Much as Cushioning
A product can survive a drop but still fail inspection because of scuffs, pressure marks, or dust. Surface contact deserves careful review. Glossy, painted, plated, polished, coated, and lens-like surfaces often need softer contact, more clearance, or a protective inner bag.
Soft foam is not always the answer. A very soft insert can collect dust or collapse too quickly. A very firm insert can look neat but press too hard on cosmetic edges. Sample testing should include rubbing, storage pressure, repeated removal, and lighting inspection.
Color and cleanliness also matter. Black foam gives a professional look and hides dust. Grey or light foam may help inspection in some kits. Color transfer, odour, cutting dust, and adhesive residue should be checked before production approval.
Practical Material Selection Table
The table below gives a practical starting point. The final choice should be confirmed against the product shape, drop risk, surface sensitivity, storage time, carton design, and sample results.
| Material | Best for | Key property | Recommended page |
|---|---|---|---|
| EVA foam | Tool trays, sample boxes, organized case inserts | Firm structure, clean cutting, stable cavity shape | EVA Business Department |
| PE foam | Lightweight protective packaging, liners, separation pads | Cushioning, light weight, practical shock reduction | PE FOAM |
| EPDM foam | Resilient pads, sealing-adjacent packs, outdoor-related parts | Compression recovery and closed-cell options | EPDM Division |
| SBR / SCR / CR foam | Soft contact layers, sleeves, flexible cushioning pads | Flexible touch and useful lamination base | NEOPRENE Division |
| Silicone foam | Heat-adjacent parts, elastic pads, special protection needs | Temperature resistance and elastic recovery | Silicone Division |
| Converted foam parts | Cut pads, routed trays, adhesive-backed parts, layered cavities | Process flexibility and scalable production | Converting |
Fit, Clearance, and the Feeling of a Good Insert
A good insert should feel controlled, not forced. When the product enters the cavity, it should settle into position without scraping. Meanwhile, it should not rattle when the tray moves. This middle point is where practical packaging quality begins.
Clearance planning is essential. If the cavity matches the exact product size, the fit may become too tight after foam tolerance, cutting tolerance, and product variation. Too much clearance creates movement. The insert should hold gently while leaving enough room for real production differences.
For CNC cutting, tool diameter and corner radius affect cavity shape. For die cutting, blade condition and material stretch can change the final profile. A drawing should not be treated as the final truth. A physical sample often reveals the details that drawings cannot show.
In multi-cavity trays, spacing between parts matters. Thin foam bridges can tear, especially near finger notches. Tight spacing may let parts touch after vibration. A stronger layout may use fewer cavities per tray but deliver better protection and longer use.
Layered Inserts, Adhesive Options, and Packing Efficiency
Layered inserts make many packaging designs easier. A top layer can guide placement. A middle layer can create depth. A bottom layer can provide cushioning. A simple foam stack can form a shaped cavity without complex molding.
Adhesive-backed foam can also simplify assembly. It helps attach pads, strips, liners, and blocks inside cartons, plastic cases, metal cases, and equipment housings. Adhesive selection must match the surface, pressure, temperature, and storage time. Otherwise, pads may shift during transport.
Lamination can combine two foam behaviours. For example, a firm base can hold shape while a softer top layer protects a finished surface. In another layout, a colored top layer can make missing parts easier to notice. Layered foam can improve both protection and organization.
Assembly time should guide the final layout. A beautiful insert that takes too long to pack can create line delays. Packing trials should measure loading speed, mistake rate, removal comfort, and accessory placement. A practical foam solution works on the line, not only in a sample photo.
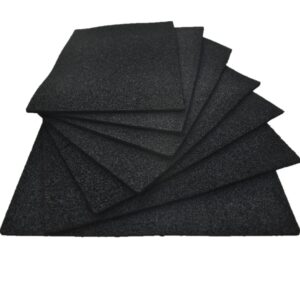
EPDM foam can support resilient pads, sealing-adjacent protection, and layouts that need recovery after compression.
View EPDM Foam MaterialQuote File Checklist for Faster Sampling
A clear quote file prevents delays. Product dimensions should include length, width, height, weight, and tolerance range. For irregular parts, a 3D file, 2D drawing, or physical sample can improve cavity planning.
The project should define the protection goal. A cosmetic presentation tray needs different planning from an export shipping insert. Likewise, a one-way package differs from a reusable service case. The request should describe transport route, storage time, expected handling, and carton type.
Material preferences should be listed when known. EVA, PE, EPDM, SBR, CR, silicone, flame retardant foam, and laminated structures may suit different needs. When material selection is still open, YIBAO Foam can suggest options after reviewing product risk and packaging function.
Surface concerns should appear early. Scratch risk, color transfer, dust, odour, adhesive residue, static sensitivity, and compression marks can change material choice. Special requirements such as flame retardant behaviour, heat resistance, low odour direction, or weather exposure should be mentioned before sampling.
Photos of the current packaging also help the review. A failed insert, loose pad layout, damaged carton, or scratched product surface can reveal the real problem. The new insert design can then solve the cause instead of copying the old structure.
Files and Details That Speed Up Review
- Product drawing, 3D file, or clear photos from several angles.
- Product weight, surface finish, fragile areas, and handling concerns.
- Carton size, case size, bag thickness, and accessory list.
- Preferred foam type, color, thickness, or performance requirement.
- Prototype quantity, pilot quantity, and estimated production quantity.
Sample Review: What to Check Before Production
A foam sample should go through practical checks, not only visual approval. The product should enter the cavity smoothly. It should not require force that bends clips, scratches surfaces, or stresses narrow parts. At the same time, it should not rattle when the tray moves.
The sample should also go through a simple movement test. The packed product can be tilted, lightly shaken, opened, and repacked. This quick check does not replace formal validation, but it reveals whether the layout feels stable during normal handling.
Contact marks should be checked after storage pressure. A product can remain in the foam for several days to simulate warehouse time. After removal, cosmetic surfaces should be inspected under light. If marks appear, the cavity may need more clearance, softer contact, or a different material.
For higher-value products or export packaging, sample review can also refer to recognised package performance testing frameworks such as ASTM D4169 for performance testing of shipping containers and systems. This type of reference helps teams evaluate shipping units against distribution hazards in a more structured laboratory setting.
Drop and vibration validation should match product value and risk. For high-value assemblies, stricter lab testing may be needed. However, even basic internal checks can catch weak corners, loose accessories, foam bridges that tear, and materials that bottom out too quickly.
Packing speed also deserves review. A tray that confuses operators can create errors. Every cavity should make placement obvious. If several pockets look similar, shape differences, labels, or color contrast can support faster packing.
Common Mistakes in Protective Foam Insert Projects
One common mistake is starting with thickness before defining the risk. More foam does not always mean better protection. If the cavity presses on the wrong feature, extra thickness can create damage instead of preventing it.
Another mistake is copying a generic tray design. Similar products can have different weak points. For example, one assembly may fail near a connector, while another needs corner shock control. The insert should follow the real product structure.
A third mistake is ignoring accessory movement. Screws, adapters, metal brackets, or cables can scratch the main product during vibration. A small accessory pocket often prevents a large quality issue. Clear placement also makes missing items easier to spot.
Some teams overlook removal force. A tight cavity may look secure during the first sample review. Repeated unpacking can create frustration and damage. A finger notch or relief cut usually solves the issue without reducing protection.
Testing too late creates another problem. Once cartons, labels, and packing instructions have been approved, insert changes become harder. Foam sampling should begin while carton size, product orientation, and packing method still have room to adjust.
Pairing Foam Inserts With Cartons, Cases, and Inner Bags
Foam rarely works alone. A strong carton, rigid case, inner bag, tray, sleeve, or separator may share the protection task. Therefore, foam packaging inserts should match the whole packaging system rather than act as a single isolated part.
A corrugated carton provides structure and stacking strength. The foam insert provides cushioning and positioning. If the carton is weak, the foam may carry too much load. If the foam is too soft, the carton may look fine while the product moves inside.
Plastic cases work well for reusable kits. In this layout, the foam must fit the case interior and resist repeated removal. A lid foam layer can hold items down, while a base cavity keeps them organized. The hinge and latch areas should not crush foam during closing.
Inner bags can protect surfaces from dust and rubbing. Bag thickness can change cavity fit. Samples should include the real bag, label, and protective film. Otherwise, a cavity that looked correct may become too tight later.
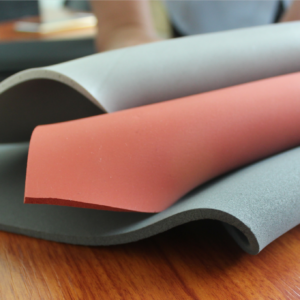
Silicone foam can support special protective pads where elastic recovery, temperature conditions, or soft sealing behaviour matter.
View Silicone Foam MaterialCost Drivers and Value Thinking
Foam insert cost depends on material, thickness, size, process, quantity, complexity, and assembly steps. A simple flat pad costs less than a deep routed tray. However, the lowest unit price may not create the lowest total packaging cost.
Damage reduction has real value. Replacing a scratched component, reshipping a spare part, or delaying installation can cost more than the insert. Packaging decisions should compare material cost with product risk, handling cost, and after-sales pressure.
Carton size also affects total cost. A thick insert may increase freight volume. A smarter cavity layout may reduce carton size while keeping protection. Early insert design can support both safety and logistics efficiency.
Tooling and setup should match volume. Die cutting may require tooling but can become efficient at repeated quantities. CNC cutting may reduce tooling needs during development but take more machine time per piece. The best process depends on order pattern and design stability.
Labor cost matters as well. A tray that reduces packing time can offset part of the material cost. If the layout prevents missing accessories and repacking, the savings become even stronger. Clear packing can also reduce training time for new operators.
Working With YIBAO Foam on Insert Development
YIBAO Foam supports foam material selection, cutting, lamination, adhesive backing, and converting for industrial packaging projects. The process can start from drawings, product photos, samples, carton size, or existing packaging issues. Then, the team can review risk points and suggest a practical material and process direction.
For new products, early packaging discussion helps avoid rushed decisions. A small change in carton size, product orientation, or cavity depth may improve protection significantly. Packaging should not wait until the launch date is close.
For existing packaging, the review can focus on failure points. Scratches, loose accessories, cracked corners, compressed pads, and slow packing steps all reveal useful clues. In many cases, a targeted insert adjustment solves the problem without redesigning the entire carton.
For pilot production, sample quantities can test fit, material feel, and packing method. After review, drawings and process details can move toward mass production. This step-by-step method reduces risk and keeps the packaging plan practical.
Extended Reading and Useful YIBAO Pages
For projects that need material comparison, process planning, or sample development, the following YIBAO pages can help connect the insert design with practical foam production and converting options.
Conclusion: Build the Insert Around Real Protection Needs
Protective packaging works best when the insert follows the product, the shipping route, and the packing workflow. First, define the real risk: movement, impact, abrasion, accessory damage, storage pressure, or slow packing. Next, choose the insert style: pad, tray, block, end cap, layered cavity, or full case layout. Finally, validate the sample with real product parts, real carton size, and real handling steps.
For projects that require custom foam inserts or shaped foam trays, YIBAO Foam can support material suggestions, sample review, and converting plans for protective packaging. A practical review can compare EVA, PE, EPDM, SBR, CR, silicone, flame retardant foam, die cutting, CNC routing, adhesive backing, and laminated structures. With the right plan, a shaped foam insert can protect products more consistently while making packaging cleaner, faster, and easier to repeat.
Three Practical Next Steps
- Prepare product dimensions, weight, photos, carton size, fragile zones, and accessory list before requesting a quote.
- Test one sample with the real product, real bag, real carton, and real packing sequence.
- Review protection, removal comfort, surface marks, accessory control, and packing speed before mass production.
FAQ
What are shaped foam trays used for in protective packaging?
They hold products in fixed positions, separate fragile surfaces, reduce movement, and improve packing consistency. They can also organize accessories and make missing parts easier to notice before shipment.
When are die cut foam inserts better than routed trays?
Die cut foam inserts are usually better for flat profiles, repeated pads, simple cavities, spacers, and larger repeated quantities. Deeper cavities and complex case layouts often need CNC routing or layered construction.
Are CNC foam inserts suitable for prototype packaging?
Yes. CNC foam inserts can support prototype work, pilot runs, sample cases, repair kits, and complex layouts. Since CNC cutting can adjust designs without traditional die tooling, it often helps when product shape may still change.
Which foam material works best for packaging inserts?
There is no single best material for every project. EVA often suits firm trays and organized layouts. PE can suit light cushioning. EPDM supports resilience. Silicone can support special heat-adjacent pads. The right choice depends on product weight, surface finish, drop risk, and storage conditions.
How can YIBAO Foam support protective insert development?
YIBAO Foam can review drawings, photos, sample parts, carton size, material goals, and target quantity. The team can also suggest foam materials, die cutting, CNC routing, adhesive backing, lamination, and sample steps for a practical packaging plan.